There are many reasons why to export your Office 365 mailbox to PST may be necessary, besides the obvious reason of backup and recovery. Following are the reasons to export mailboxes in Office 365 Exchange Online
- To ensure availability of mails offline for:
- Business continuity during breakdown / failures.
- For forensic analysis of selective mail content
- For compliance and regulatory needs
- For archiving, reuse and sharing mail items, folders and other user data.
- For deprovisioning Office 365 users and moving their mail content offline.
So, what does the Microsoft Office 365 Portal offer?
There are no specific tools or a PowerShell cmdlet (like the New-MailboxExportRequest cmdlet in on-premises Exchange) to export your Exchange online mailboxes to PST. However, you can use the Microsoft’s in-place eDiscovery PST export tool available in your Exchange Online admin center or the Import and Export wizard available in your Microsoft Outlook to export your mailboxes.
How to configure and export office 365 mailboxes to PST using eDiscovery?
Step 1:
Once you login into your Office 365 admin portal, open the Office 365 Admin center as shown in the image below:
Step 2:
From Office 365 admin center, navigate to your Exchange Admin center.
Step 3:
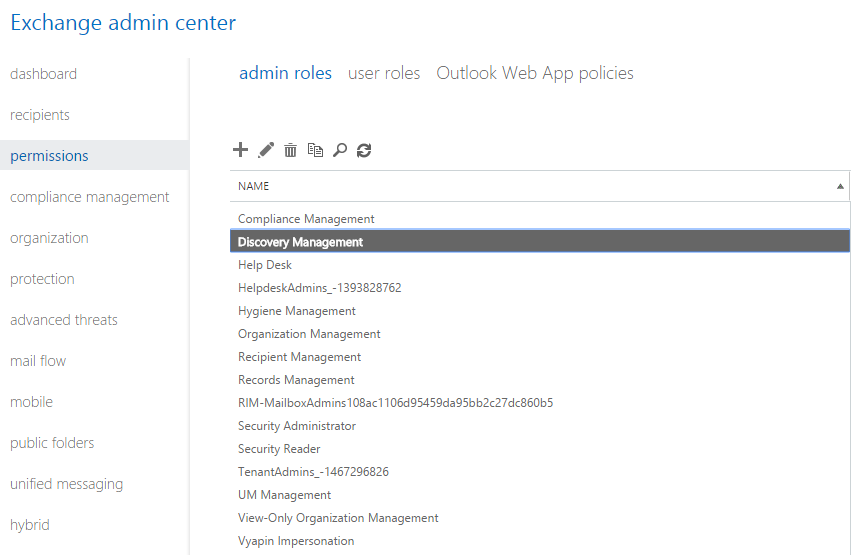
Note that, in order to use eDiscovery management, a user needs to be assigned ‘Discovery Management’ role in the Exchange admin center.
Step 4:
Click on Edit icon to add the necessary roles for this Discovery Management role group.
Step 5:
Make sure that Legal Hold, Mailbox Import Export and Mailbox Search roles are added in the Roles By default, ‘Mailbox Import Export’ role will not be assigned for this role group. If it is missing, please add using the ‘Add role’ button.
Step 6:
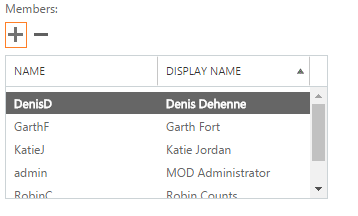
In the same window, add your account in the members list, and click Save.
Step 7:
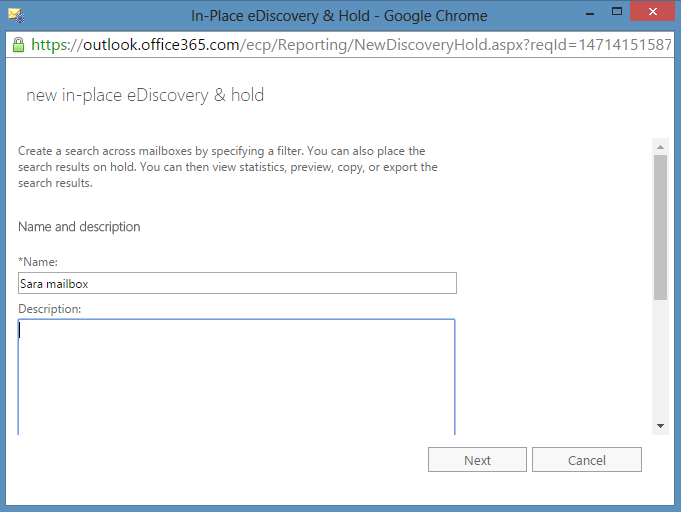
Go back to Exchange Admin center click on Compliance Management, click on ‘New’ button, to launch the ‘In-Place eDiscovery & Hold’ wizard, type a name for the litigation hold and click ‘Next’.
Step 8:
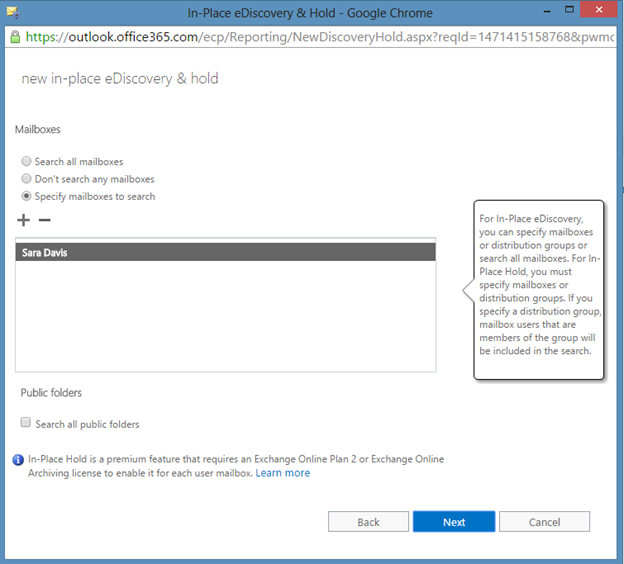
In the next step, you will be asked to select the mailboxes for performing the search. I’m selecting ‘Sara Davis’ mailbox for performing the search. You can opt to search in all the mailboxes too instead of selecting the mailboxes specifically.
Step 9:
You can see that there is an option to search for content in your ‘Public Folders’ too. You can select this option if you wish to export your Public Folder content too.
Step 10:
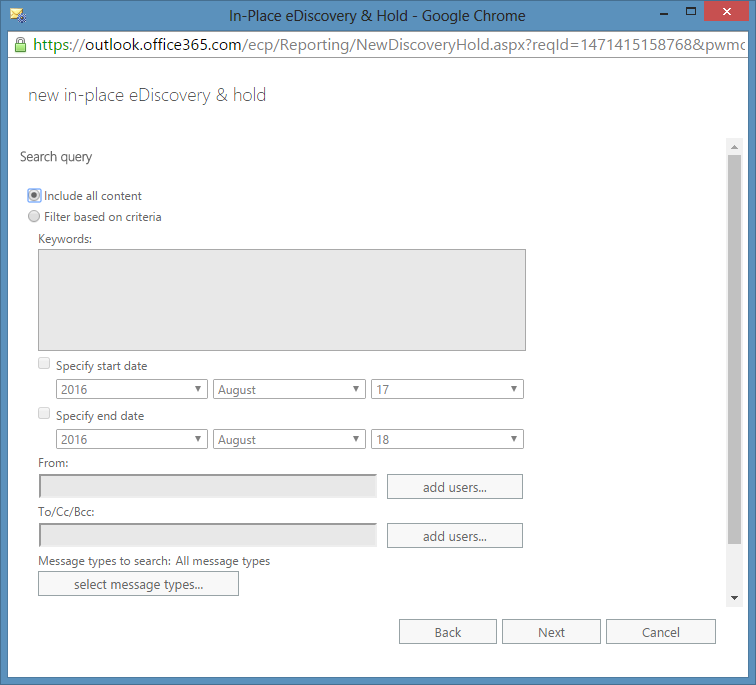
The next step will provide you several filtering options, to filter mails in your Mailbox or Public folders.
Step 11:
The next step will be the In-Place hold settings, which is not needed for our requirement to export mailboxes. You can skip this step. Click ‘Finish’ to save your settings.
Step 12:
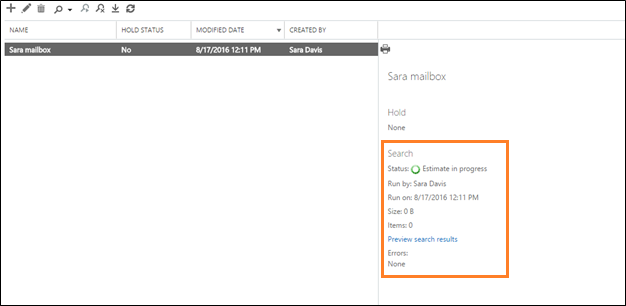
After saving the settings, you can see that the search settings we have saved will be displayed, and you can also see the progress of the search in the right pane.
Step 13:
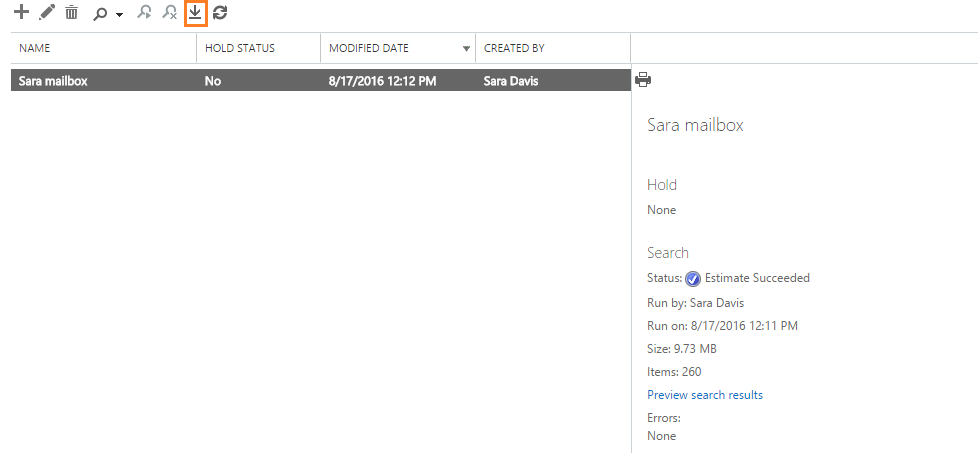
Once the search process is completed, the status of the search will be shown as below:
Step 14:
Now you can export this search result to PST by clicking on the ‘Export to a PST file’ button.
Step 15:
Microsoft’s own ‘Click Once’ application will be downloaded. Please note that you have to use the latest browser version to run the application.
Step 16:
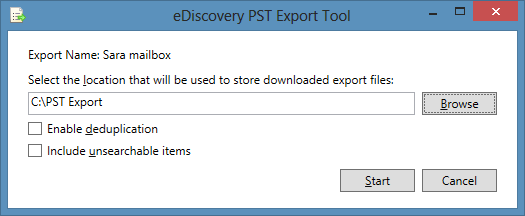
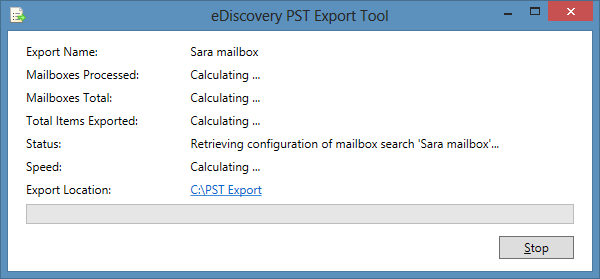
Specify the export location where you want to save the files and click on ‘Start’ to start the export process.
Limitations of using eDiscovery approach:
- You cannot schedule / automate the Office 365 PST export process
- This is a premium feature which requires at least Exchange Online Plan 2 or Exchange Online Archiving license.
- You cannot particularly select which folders to export
Export your Mailboxes using Outlook
You can also export your mailbox and public folder contents using Microsoft Outlook. For this you need an Office 365 user account to be configured in your Outlook, and this user account should have Full Control permissions on all the other mailboxes which you want to export.
For information about assigning permissions to other mailboxes, please refer the following TechNet article, https://technet.microsoft.com/en-us/library/bb124097(v=exchg.160).aspx
Once you assign the required permissions on the mailboxes it may take some time to appear in your Outlook (say about 30 minutes or so depending on the mailbox content) and get the content synced to Outlook. Once you can see the folders in your Outlook it is a straightforward process from then on.
- Launch the Import and Export wizard by clicking on File -> Open & Export -> Import/Export.
- In the wizard, select the Export to a file option and click on Next. Select the Outlook Data File (.pst) option, in the screen which asks you for the file type to export.
- In the subsequent screens, you will be asked to select the mailbox or public folder to export and the export location to save the exported files. On providing these, the selected mailbox / public folder will be exported.
Limitations of using the Microsoft Outlook approach:
- You cannot select multiple mailboxes to export
- You cannot particularly select the folders to export (multiple folder selection not allowed)
- Exporting Office 365 mailboxes in bulk almost impractical
Using Alternative third party tools
You may use third party software like the Vyapin Office 365 Export Tool which is available as part of the Vyapin Microsoft 365 Management Suite. The tool has additional options to select mailboxes and schedule your export at predefined intervals.
Download free trial version of Office 365 Export Now!


