With the advent of SharePoint 2013 and the new version of Office 365, SharePoint administrators may feel the business need to move content from old SharePoint servers to the newer version. Vyapin’s SharePoint to SharePoint migration solution, XPlica for SharePoint helps administrators accomplish this task with minimal effort. XPlica can migrate Sites, Libraries, Lists and Items along with their metadata from one SharePoint version to another.
Explained below in a series of steps is how to go about this migration of content between two SharePoint servers using XPlica for SharePoint.
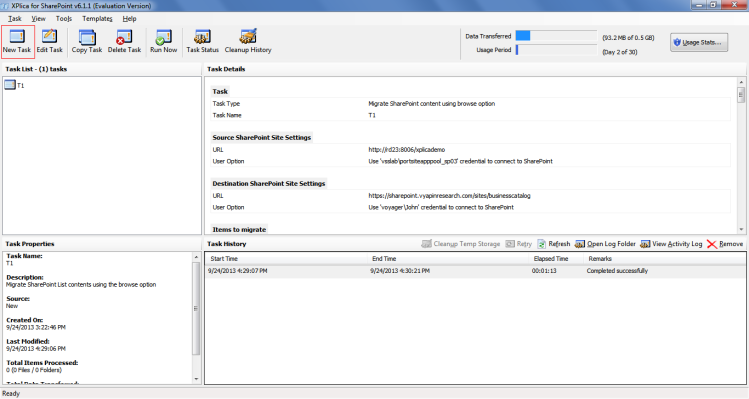
New Task
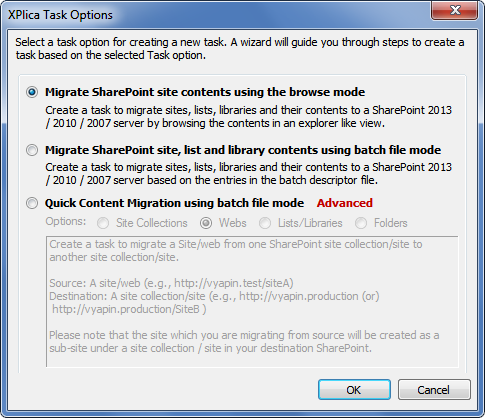
XPlica Task Options
Once selected, it opens up the XPlica Task Options window which offers multiple wizards to help with migrating content. Here’s a view of the window.
There are 3 wizards to help with migration. They are:
- Migrate SharePoint site content using the browse mode
- Migrate SharePoint site, list and library content using batch file mode
- Quick Content Migration using batch file mode
Use the “Migrate SharePoint site content using the browse mode” for a Windows Explorer like option to select Site content you would like to migrate. Click OK.
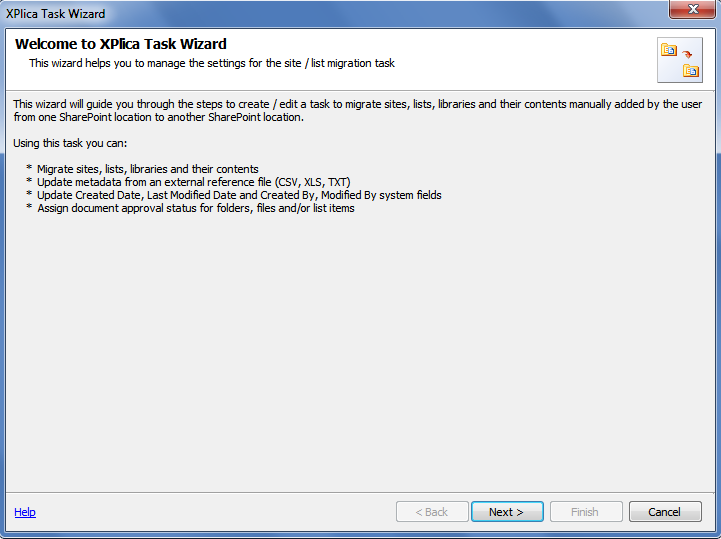
Welcome to XPlica Task Wizard
The next step is the Welcome to XPlica Task Wizard as shown below.
Click Next.
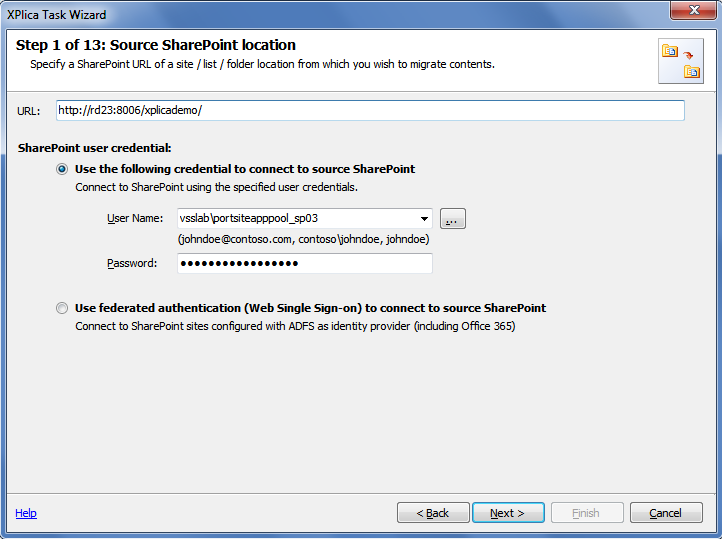
#1 – Source SharePoint Location
The next step is the Source SharePoint Location, shown below.
Key in the URL of the Site / List / Folder from which you wish to migrate content. You must also key in the credentials – Username and the Password, to allow XPlica to be able to access the specified objects.
The Username entered must be in any one of the following formats:
- Domain nameUser name
- User name@Domain name
- User Name
The ![]() – Profile Manager can be used to store user profiles for use. This also becomes useful when using Scheduled Migration tasks.
– Profile Manager can be used to store user profiles for use. This also becomes useful when using Scheduled Migration tasks.
The other option – Use federated authentication (Web Single Sign-on) to connect to source SharePoint is used to sign in to a SharePoint Site using an Active Directory Federated Services federated identity.
Click Next once you have added the appropriate credentials.
#2 – Destination SharePoint Location
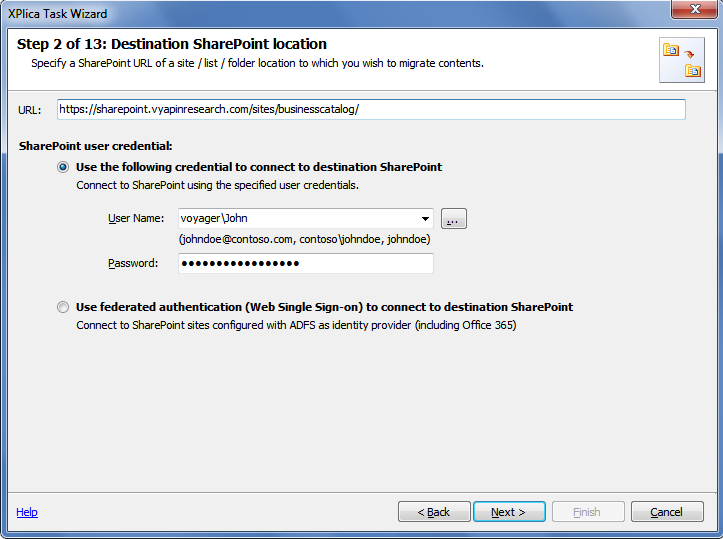
Next the Destination SharePoint location is where you specify the destination Site / List / Folder into which you wish to migrate the selected Site Contents.
The format in which you enter the user credentials are the same as used in specifying the source SharePoint location. Here is how the window looks.
Click Next when you have entered the user profile details.
#3 – Items to Migrate
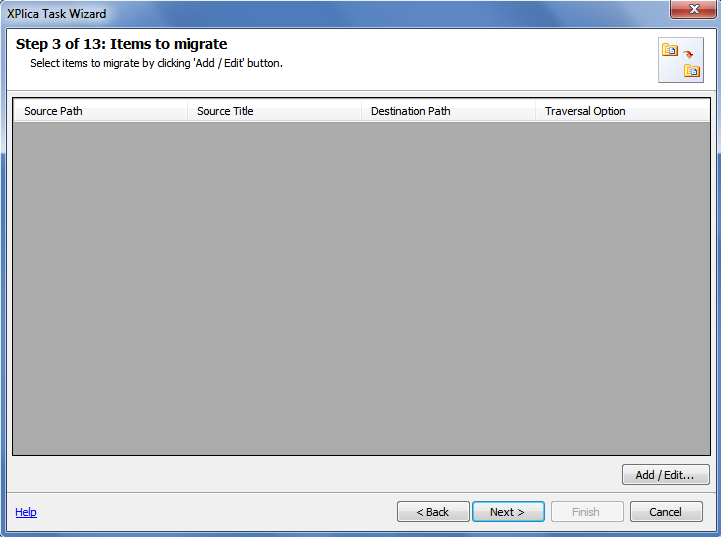
The next step is the Items to Migrate where you select the Site Content – Site / Library / List/ Item / Folder to migrate to the destination SharePoint.
Click Add/Edit to open up the selection window.
Select contents to migrate
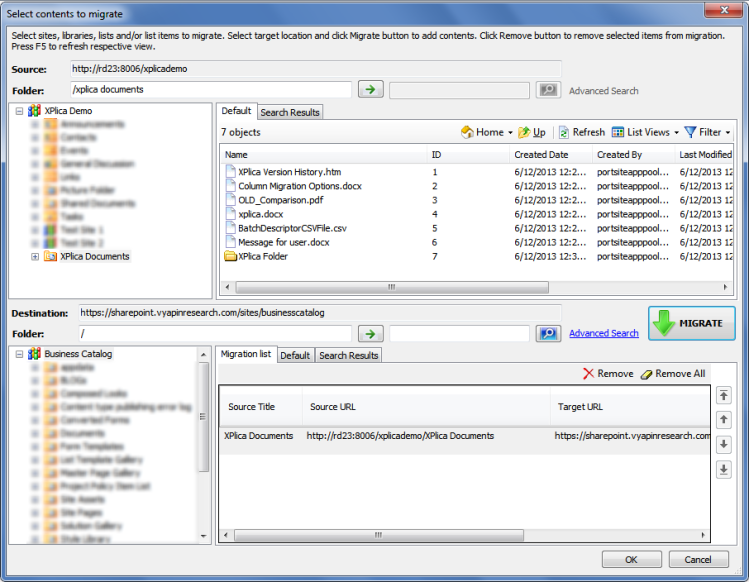
The next step is the Select contents to migrate window which guides you into selecting the Site Content from the appropriate location in the source server you wish to migrate. You also specify the destination folders where you want to migrate the selected content.
The contents in the source and destination Sites are displayed in Tree View to help with the selection process. Move down to the preferred folders by expanding the + sign and click the Folders / Items you wish to migrate.
Click the ![]() button to confirm and move your selection. The selected content is displayed in the box towards the right of the Tree View.
button to confirm and move your selection. The selected content is displayed in the box towards the right of the Tree View.
Note: Selecting List Items for migration based on search results is not applicable for SharePoint 2003.
Once you have selected the Item(s) to migrate, click OK.
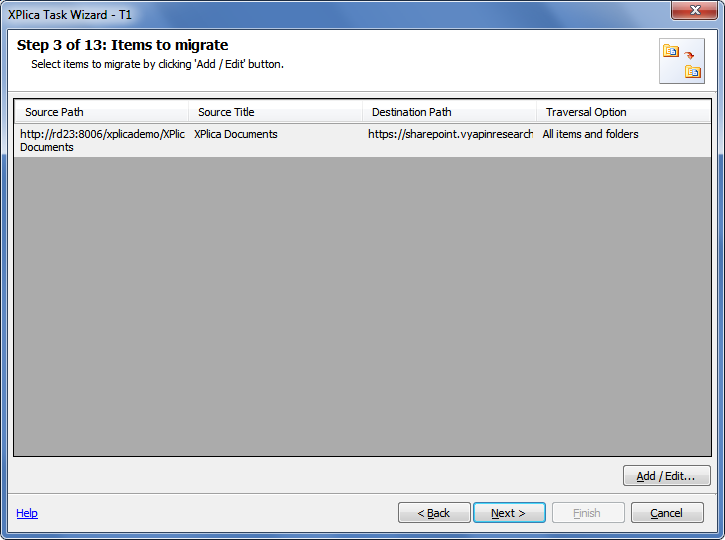
You are taken back to the Items to Migrate window which now displays all the content you have selected for migration. Here is a sample snapshot showing the selected Items.
Click Next.
#4 – Version Options
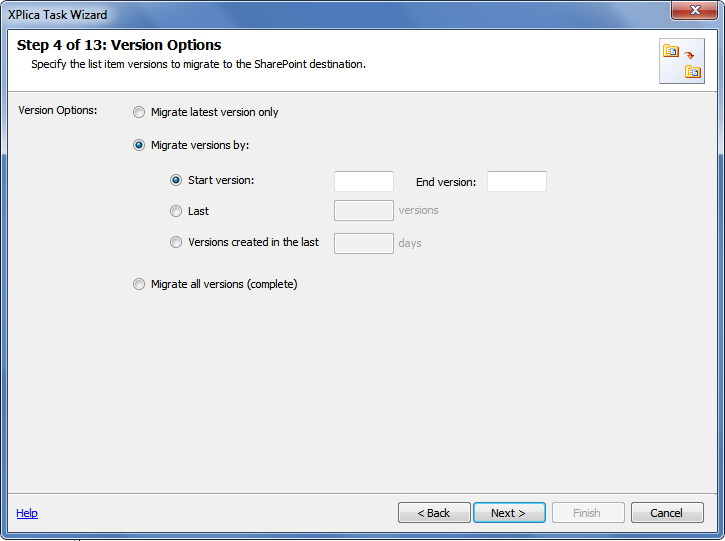
You are taken to the Version Options window which helps you select the versions of the Items / Documents you would like to migrate to the destination.
This window offers you several options to select the version of the content to be migrated. They are:
- Migrate latest version only
- Migrate versions by
- Start version > End version
- Last “n” versions
- Versions created in the last “n” days
- Migrate all versions (complete)
By default the Migrate latest version only is selected. You may select an option according to your need.
#5 – SharePoint Column Options
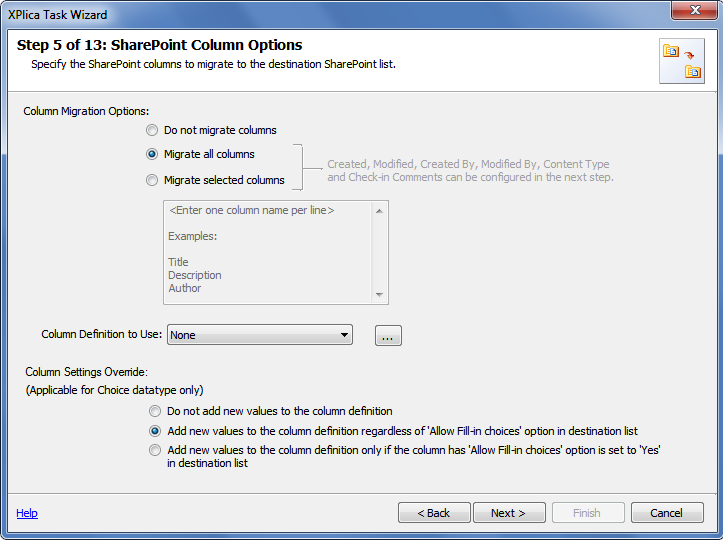
Next you need to specify the SharePoint Column Options
It has three choices:
- Column Migration Options
- Column Definition to use
- Column Settings Override
The Column Migration Options help you specify which column values you want updated in the destination SharePoint and how.
The Column Definition to use option allows you to replace Lookup Lists / Term Sets / External Content types with valid / new Lookup Lists / Term Sets / External Content Types at the destination SharePoint server.
The Column Settings Override options are there to help you update column definition in the destination SharePoint server.
Once you have selected the preferred settings, click Next.
#6 – Mapping Templates
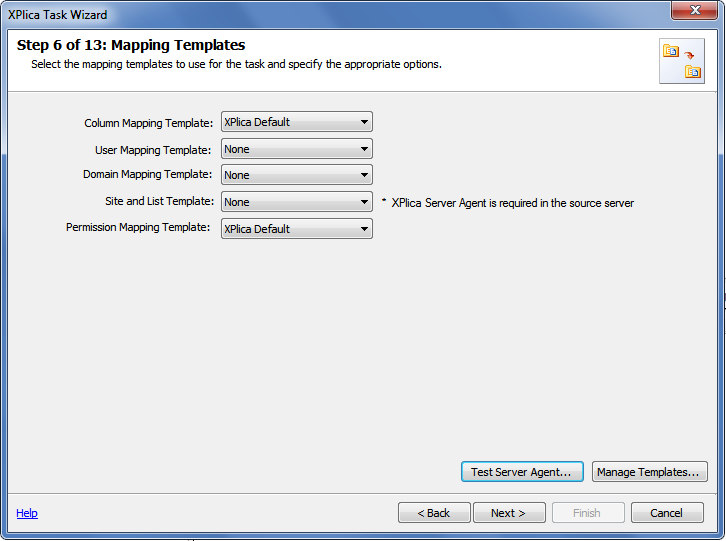
The Mapping Templates window allows you to create custom mappings and apply them as necessary. The list of templates available and what they mean are explained below.
- Column Mapping Template – allows you to map metadata properties between SharePoint columns
- User Mapping Template – allows you to replace unavailable users / groups with valid users / groups in the destination SharePoint server.
- Domain Mapping Template – allows you to replace unavailable old domains with valid and new domains in the destination SharePoint server.
- Site and List Template – allows you to replace unavailable Sites / Lists Template with valid and new templates available in the destination SharePoint server.
- Permission Mapping Template – allows you to assign new permission levels or replace unavailable permission levels with valid permission levels in the destination SharePoint server.
Here is a view of the Mapping Templates window.
These mappings can be created using the ![]() button situation at the right bottom. Clicking this opens up the XPlica Template Manager window. Here is a screenshot showing the XPlica Template Manager with templates created for each of the mapping options.
button situation at the right bottom. Clicking this opens up the XPlica Template Manager window. Here is a screenshot showing the XPlica Template Manager with templates created for each of the mapping options.
Note: For certain options XPlica Default templates are provided. They are:
- Column Mapping
- Unique Column Values
- Permission Mapping
You may create additional templates as necessary for your migration needs.
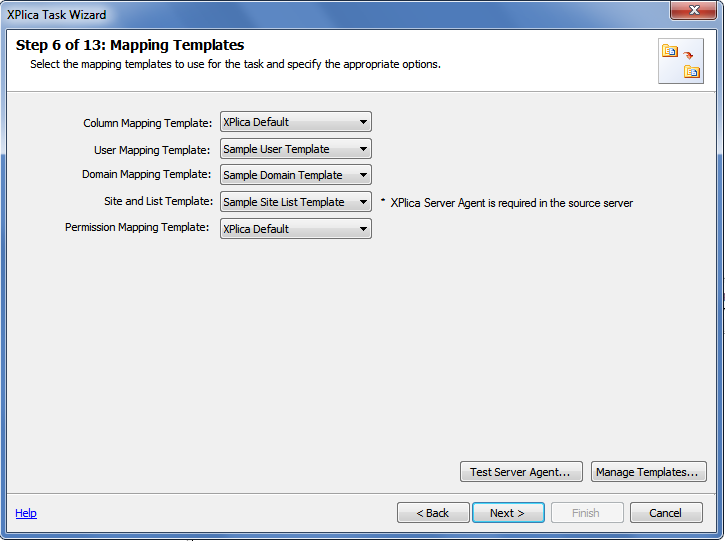
Click Close once you have created the required mapping templates. You are taken back to the Mapping Templates window which will now reflect the changes. Here is a sample.
Click Next once you have completed the mapping process.
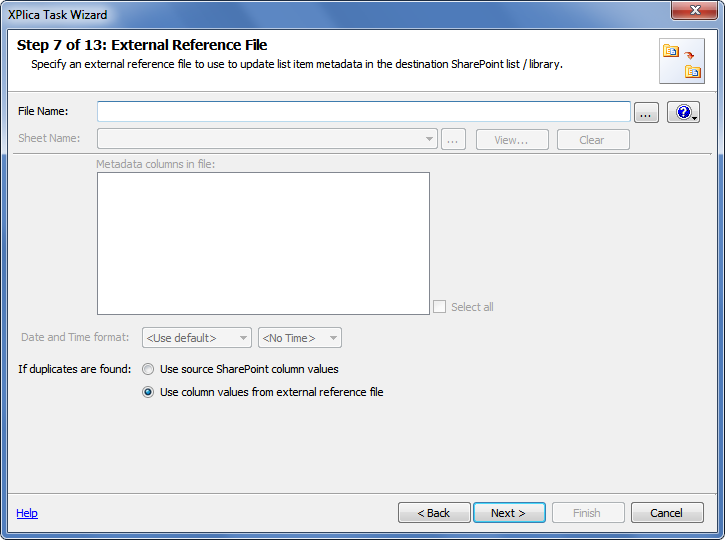
#7 – External Reference File
You are now shown the External Reference File window. This option helps you replace metadata values in the target SharePoint server with new values that are specified in the metadata file during migration. Basically, XPlica substitutes the values in the source server with the values in the metadata file during migration.
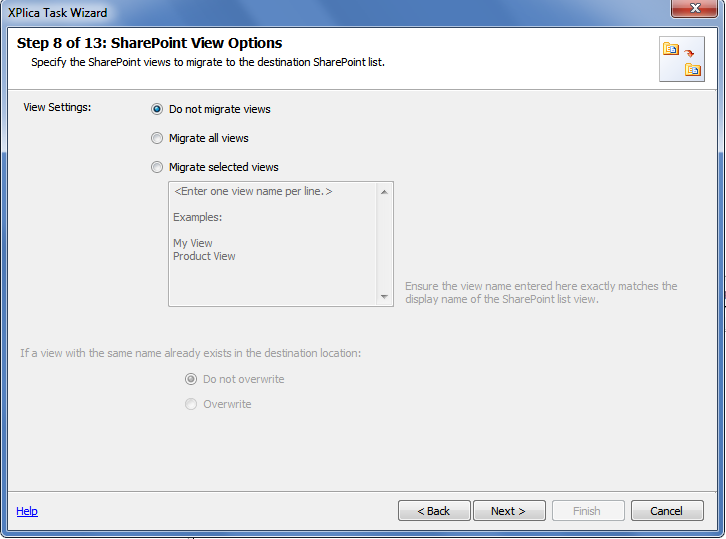
#8 – SharePoint View Options
The next step is the SharePoint View Options which helps you specify whether you want to migrate the existing SharePoint views from the source server to the destination server.
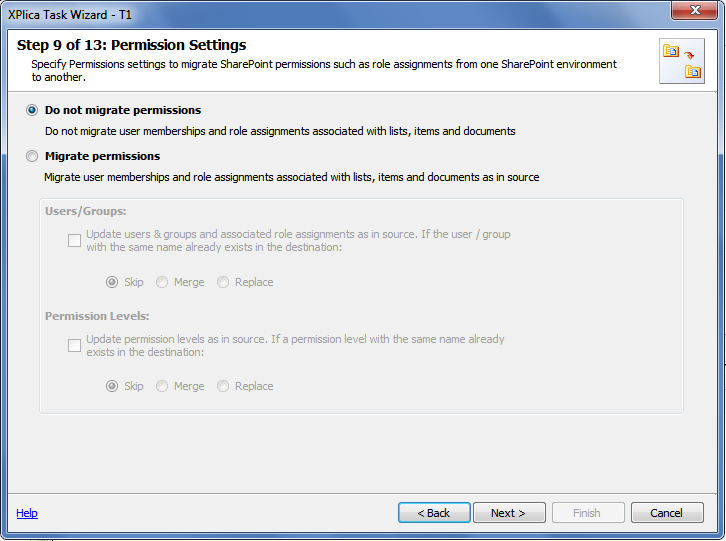
#9 – Permission Settings
Next the Permission Settings step allows you to select and migrate user memberships and role assignments associated with Lists, Items and Documents.
The Migrate Permissions option is helpful if you intend to migrate users / groups along with their respective role assignments from the source server to the destination server. You can also use this option to create unavailable users / groups and their associated permissions with various Libraries / Lists / Items / Documents. Along with these, you also have the option to Skip, Merge or Replace the permissions.
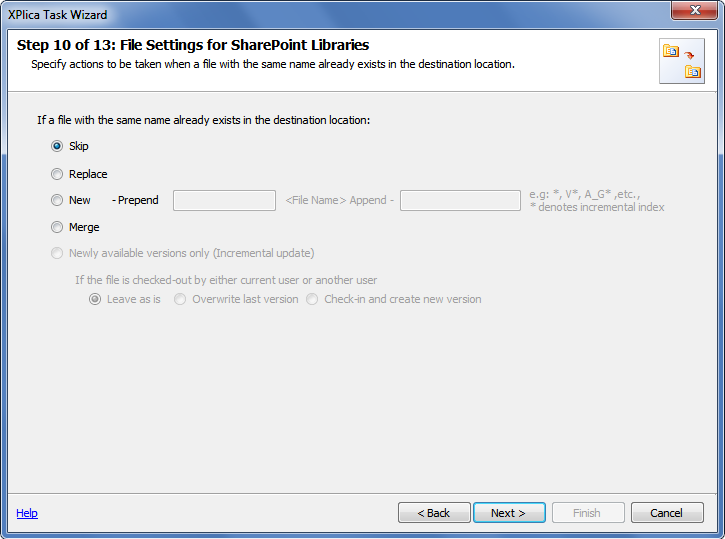
#10 – File Settings for SharePoint Libraries
The next step is the File Settings for SharePoint Libraries which helps you tide over situations where a file with same name already exists in the destination server.
In case of a file with the same name, you have the following options:
- Skip
- Replace
- New – Prepend or Append characters to the file name
- Merge
#11 – List Item Settings
Next the List Item Settings window helps you select what action to take when a List Item with the same value already exists in the destination SharePoint server.
The two options dealing with Lists are:
Append new list items (allows duplicates excluding folders) – creates List Items with the same value
Update list items based on reference columns (avoid duplicates) – tells XPlica whether to create or update the List Item in the destination server.
The other two options – As in SharePoint source & Do not migrate attachments; detail what to do while migrating List Item Attachments.
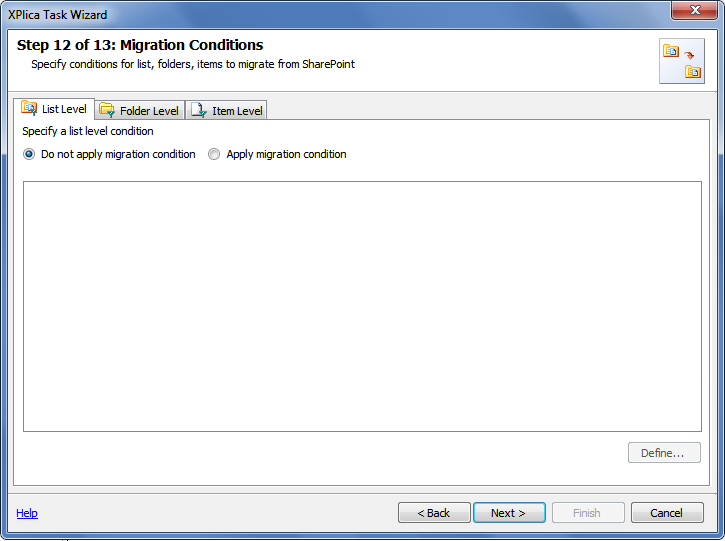
#12 – Migration Conditions
The next step Migration Conditions allows you to apply conditions to filter out unnecessary Folders / Items / Lists during migration. You can apply these conditions at various levels
- List Level
- Folder Level
- Item Level
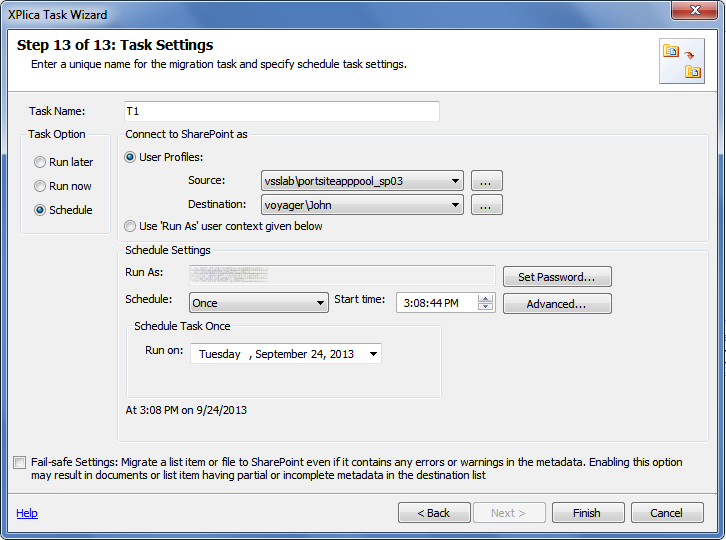
#13 – Task Settings
The next step Task Settings allows you to set a unique name for the particular migration task. You may also schedule the task to run at the pre-determined time.
You need to assign a valid Windows Domain account at the Run As field to run the migration task or select one of the appropriate user profiles set earlier.
Here is a screenshot of the above mentioned step showing a set scheduled task.
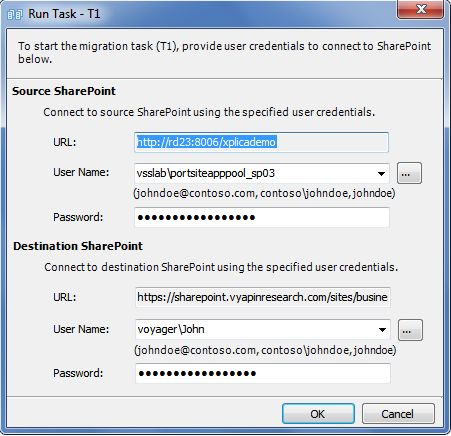
If running the migration task immediately you will see the Run Task window asking you to confirm the credentials.
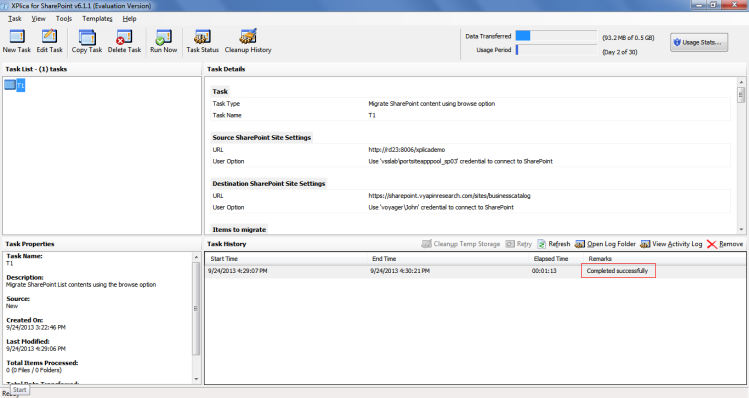
A progress indicator displays the status of the task.
On completion the Task History indicates the completion of the task with a message – Completed Successfully as shown in the image below.
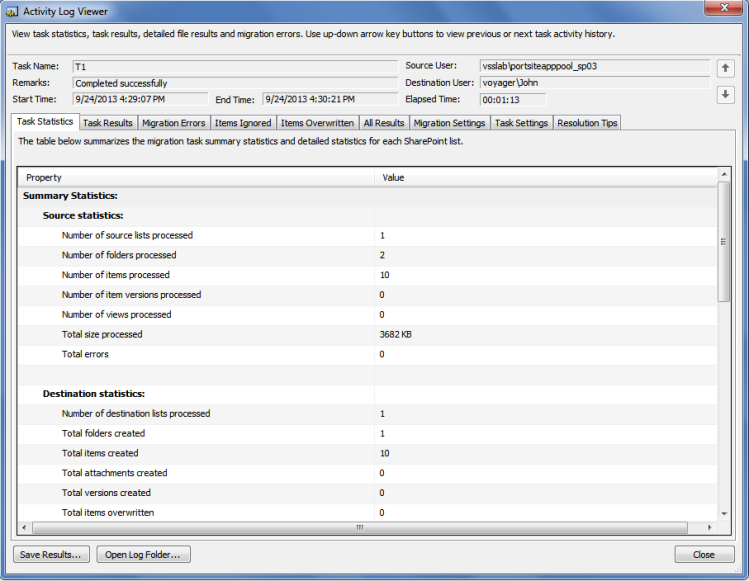
You may check the details of the task executed under the View Activity Log. Here is a view of the Activity Log.
This completes your SharePoint 2003 to SharePoint 2013 Site Collection migration task.
For complete information on XPlica for SharePoint, please visit – https://www.vyapinsoftware.com/products/sharepoint-migration/dockit/sharepoint-migration-tools

